Support for this connector has been deprecated and will be removed in a future release. Refer to the Connector deprecation plan for details.
This section describes how to create and configure a MariaDB Data Source Name (DSN).
-
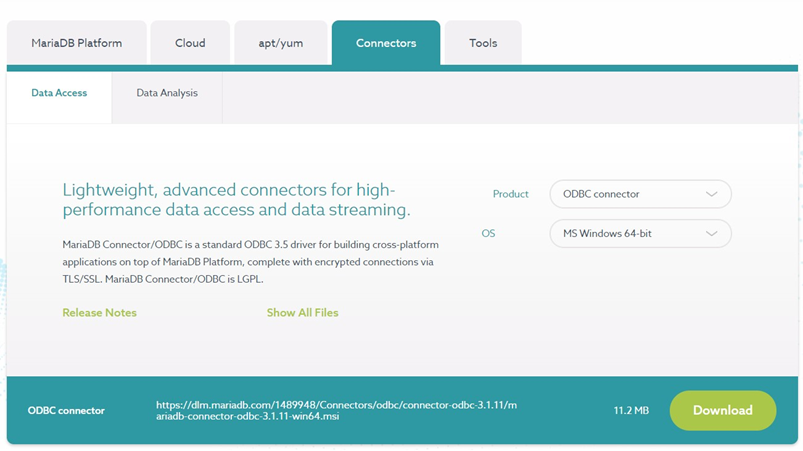
In a web browser, navigate to https://mariadb.com/downloads/#connectors to download the driver.
-
In the download page, set product to ‘ODBC Connector’ and OS to ‘MS Windows 64-bit’. Click Download.
-
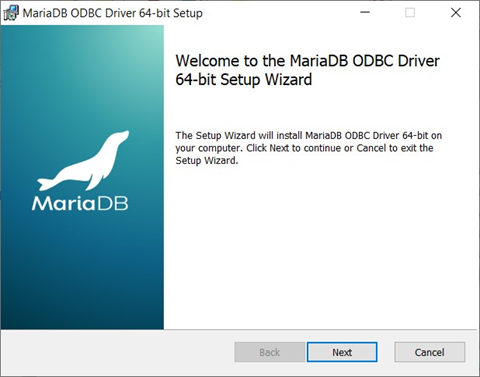
After downloading the file, go to the downloads folder. Locate and double-click the mlsqlodbc-1.4-6-amd64.msi file.
-
In the MariaDB ODBC Driver 64-bit Setup Window, click Next and follow the required steps to install the driver.
-
Once you have successfully installed the ODBC driver, go to Control Panel\All Control Panel Items\Administrative Tools and click ODBC Data Sources (64-bit).
-
In the ODBC Data Source Administrator Window, click the System DSN tab.
-
Click the Add...button to create a new Data Source.
-
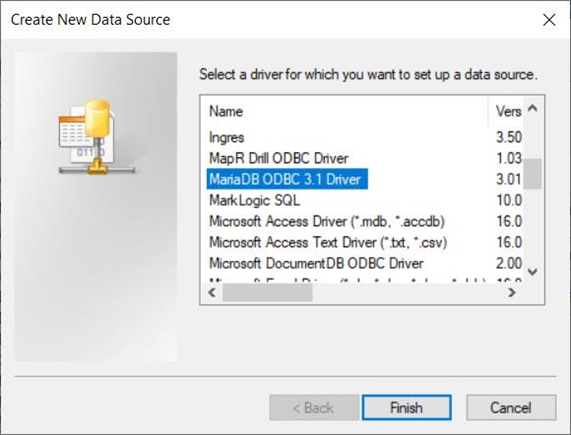
Find and select MariaDB ODBC 3.1 Driver and click Finish.
-
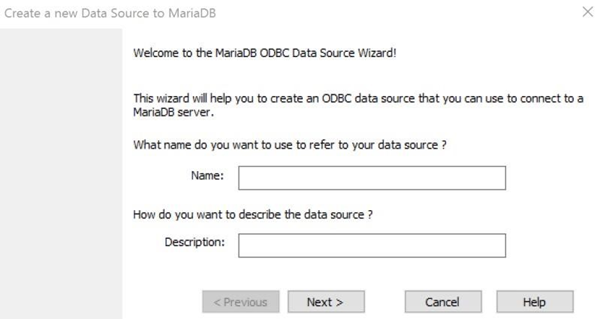
In the MariaDB ODBC Data Source Wizard, provide a descriptive name for the Data Source and click the Next button.
-
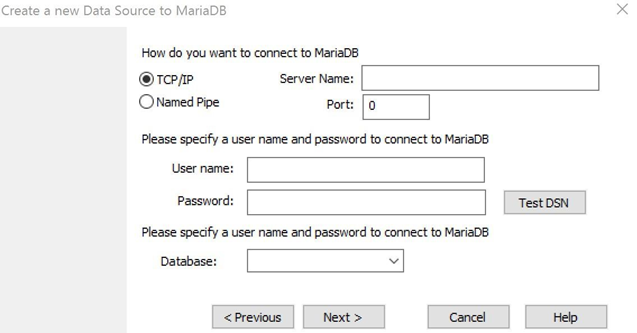
Provide the connection parameter details (Server Name, Port, Username, Password and Database). The TCP/IP option must always be selected. The default port is 4006; however, the port might change during configuration of your MariaDB cluster. Click Test DSN to test the connection. Once the connection has been verified, click Next.
-
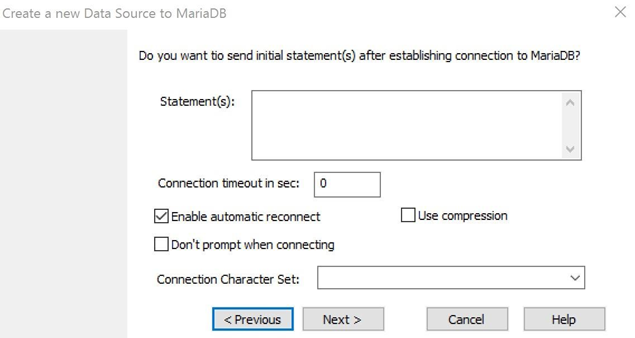
The Enable automatic reconnect option must always be selected. The other options remain as is. Click Next.
-
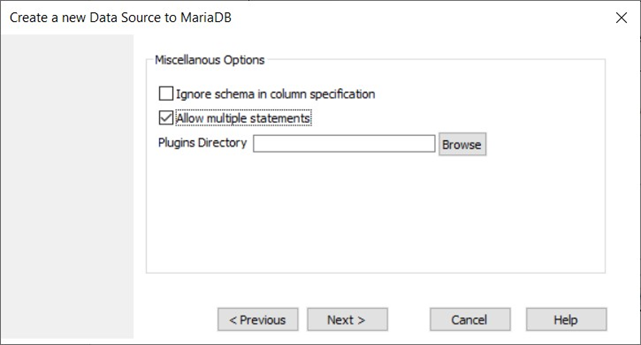
The Allow multiple statements option must always be selected. Click Next and click Finish.