This section describes how to configure a Bitly web adapter for use with RPI. Please follow the steps below:
-
In a web browser, log into https://bitly.com/a/sign_in?rd=/bbt2/ to acquire oAuth credentials such as client ID, client secret and redirect URIS.
-
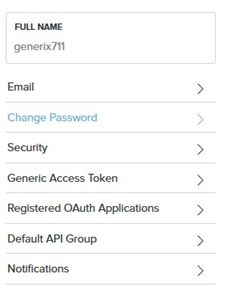
Click the Settings icon located at the upper right corner of your home page.

-
Click the account name as in the example below.

-
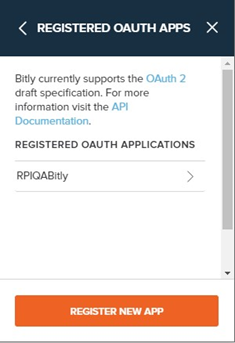
Click Registered OAuth Applications.
-
Click Register New App.
-
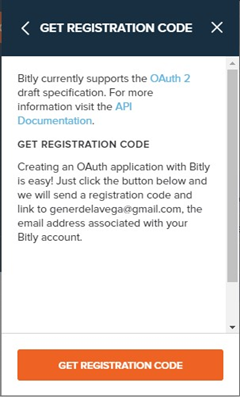
Click Get Registration Code.
-
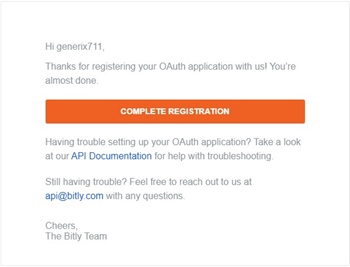
Bitly will send an email notification to complete the registration. In your mail inbox, click the Complete Registration button.
-
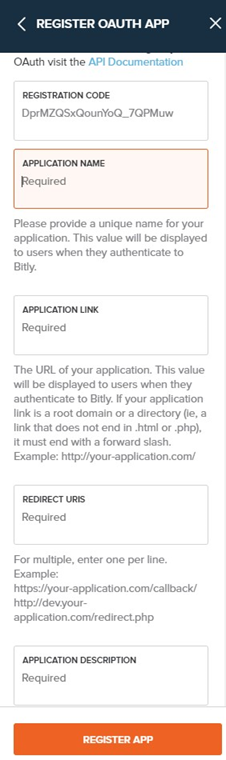
On Register OAuth App, provide values for the following entries: Application Name, Application Link, Redirect URIS, and Application Description. Click Register App to create a new OAuth application.
-
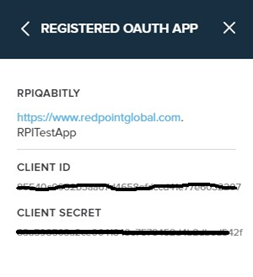
Once OAuth app is registered successfully, copy Redirect URIS, Client ID, and Client Secret. The values of these parameters will be used in RPI when configuring a Bitly web adapter.
-
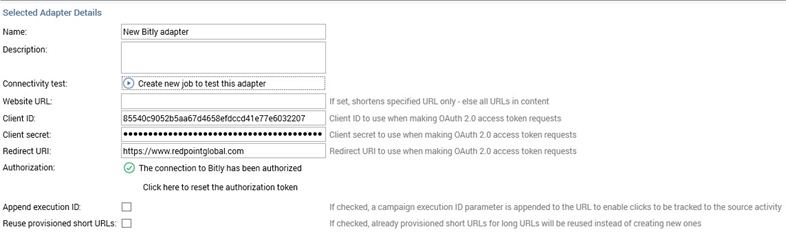
A sample configuration of Bitly Web Adapter within RPI: