This section describes how to create and configure an AWS Redshift Data Source Name (DSN). Please follow the steps below. Please note that you may skip steps from 1 –4if you have already installed the ODBC driver.
-
In a web browser, navigate to https://docs.aws.amazon.com/redshift/latest/mgmt/install-odbc-driver-windows.html to download the driver.
-
Locate https://s3.amazonaws.com/redshiftdownloads/drivers/odbc/1.4.3.1000/AmazonRedshiftODBC64-1.4.3.1000.msi to download the 64bit Amazon Redshift ODBC installer.
-
In the download folder, double click the AmazonRedshiftODBC64-1.4.3.1000.msi file.

-
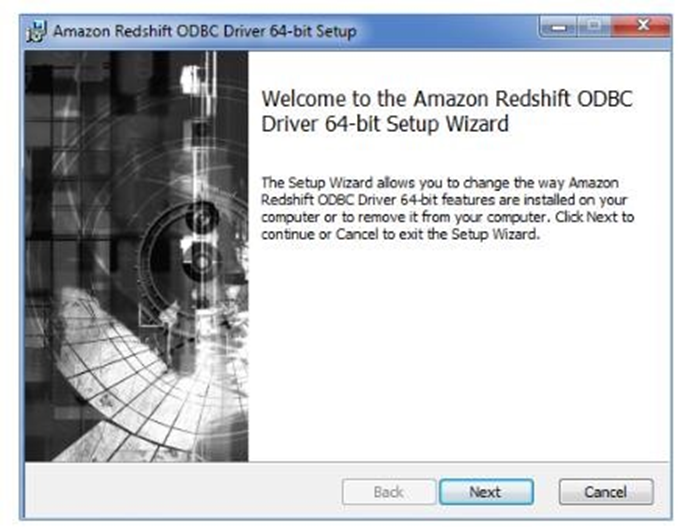
In the Amazon Redshift ODBC Driver 64-bit Setup Window, click Next and follow the required steps to install the driver.

-
Once you have successfully installed the ODBC driver, go to Control Panel\All Control Panel Items\Administrative Tools and click Data Sources (ODBC).
-
In the ODBC Data Source Administrator Window, click the System DSN tab.
-
Click the Add...button to create a new Data Source.
-
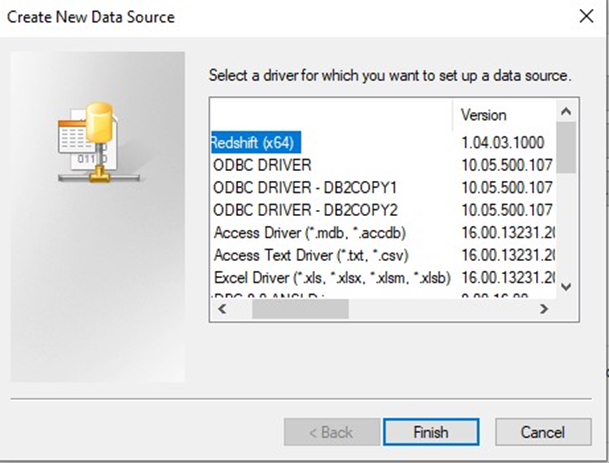
Find and select Amazon Redshift (x64) and click Finish.

-
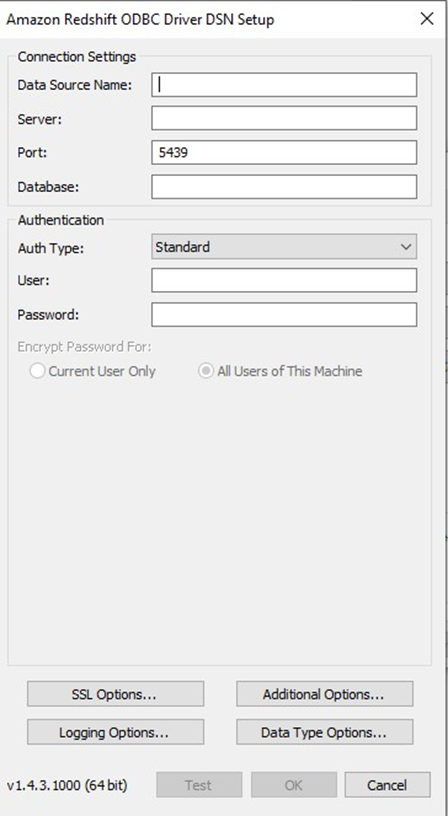
In the Amazon Redshift ODBC Driver DSN Setup Window, configure the following details:
-
Data Source Name
-
Server: the Amazon Redshift cluster endpoint URL, i.e., ‘xxx.xxx.endpointregion.redshift.amazonaws.com’
-
Port: the cluster port number. Only numerical values are supported. The default is 5439.
-
Database: the database’s name.
-
Auth Type: must be set to ‘Standard’
-
User: the database username.
-
Password: the database password.
-
Encrypt Password For: must be set to ‘All Users of This Machine’
-
Additional Options: change the radio button selection to Use ‘Multiple Statements’.

-
-
Click the Test button. Once the connection has been made successfully, click the OK button to create the DSN.
-
Once completed, launch Server Workbench and login.
-
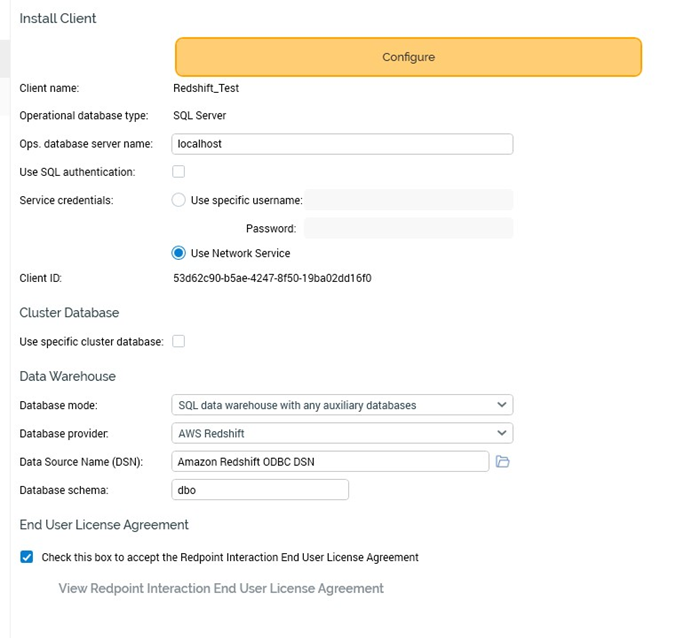
In the Install Client at Data warehouse pane, select AWS Redshift as the database provider.
-
Enter the Server name. This can be either the DNS (Domain Name System) or an IP address of the server.
-
Enter the Database provider.
-
Enter the Data Source Name.
-
Enter the Database schema.
-
Check the End User License Agreement checkbox and then click Next.


