Supported Facebook connectors
RPI facilitates integration with Facebook in the following contexts:
|
Connector |
Description |
Required App Permissions |
|---|---|---|
|
Facebook Offline Conversions |
The Facebook Offline Conversions connector allows users to push offline data, such as in-store transactions, to the Facebook platform where it will be matched to determine how many customers viewed or clicked on a Facebook Ad, prior to the event occurring. |
v22/v23: |
|
Facebook Custom Audiences |
The Facebook Custom Audience connector allows users to generate predefined and custom data files and pushes that data to the Facebook platform as either a new custom audience or appended to an existing custom audience. This process will generate a set of aggregated metrics, which can be viewed within the application. |
v22/v23: |
Create a Facebook app
To use Facebook connectors in RPI, a Facebook App must be provisioned and configured with the appropriate permissions, depending on the connector.
A Facebook developer account is required to manage authentication for the Facebook Marketing and Graph APIs.
-
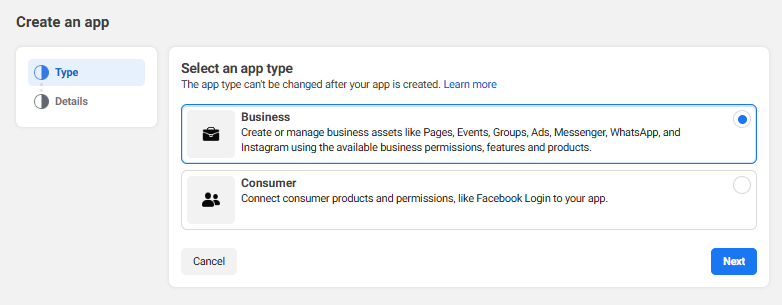
Log into a Facebook developer account. Go to the Apps page and click Create App. Fill in the app details and click Next.
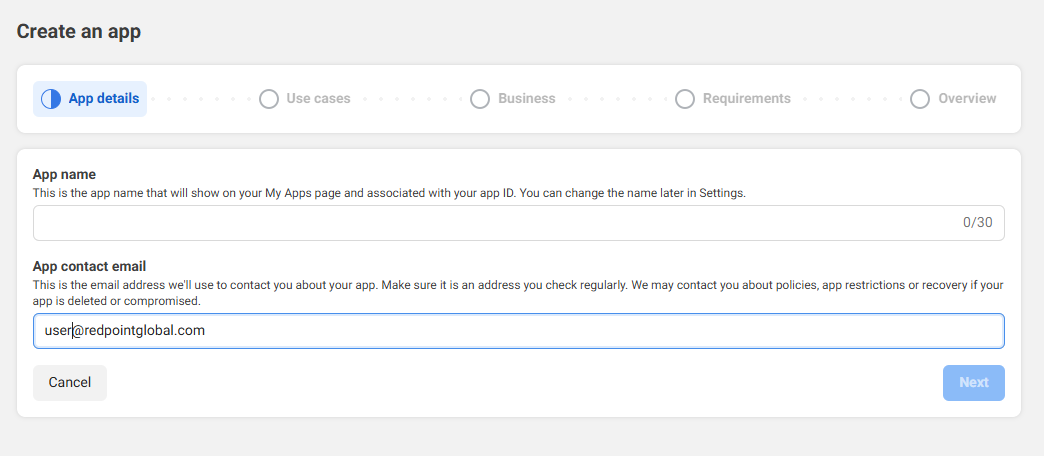
-
On the Use Cases page, scroll down to the bottom and choose Other and click Next.
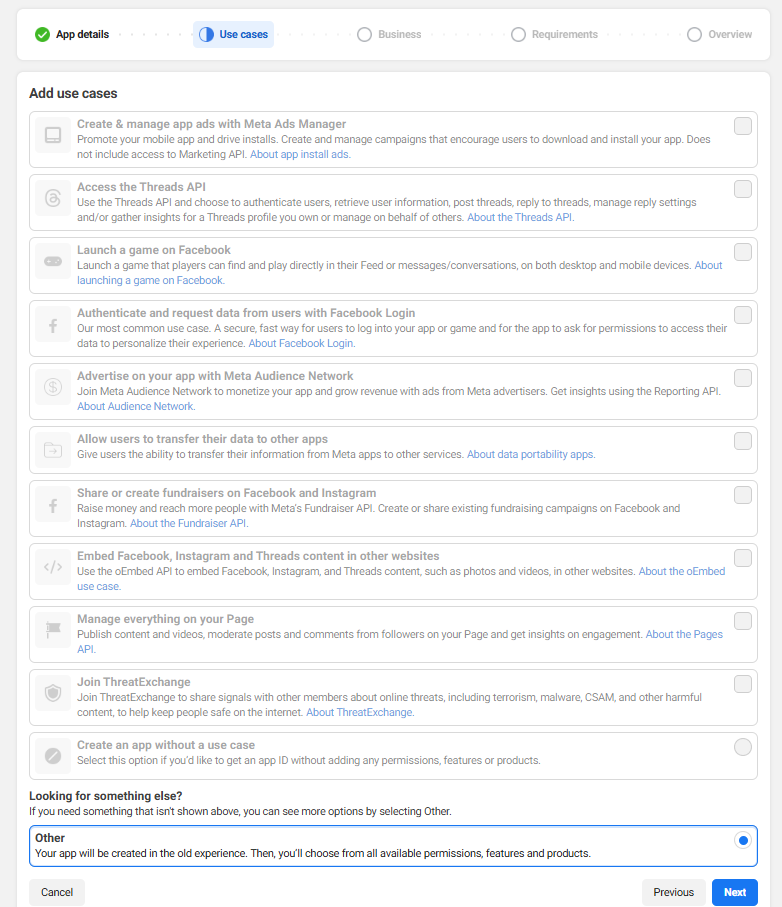
-
Select Business as the app type and click Next.
-
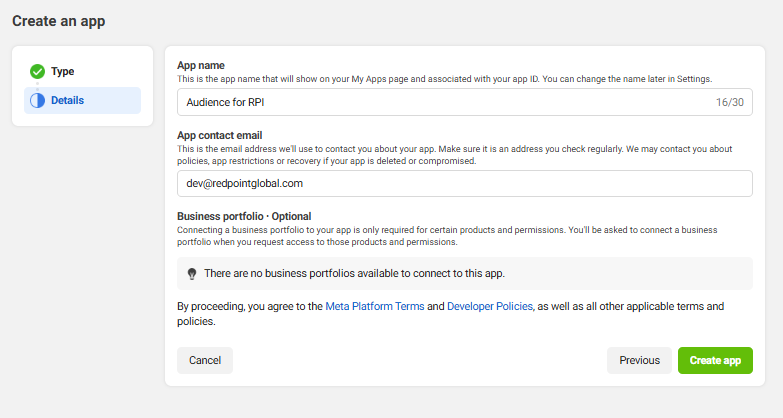
Verify the app details then click Create app.
-
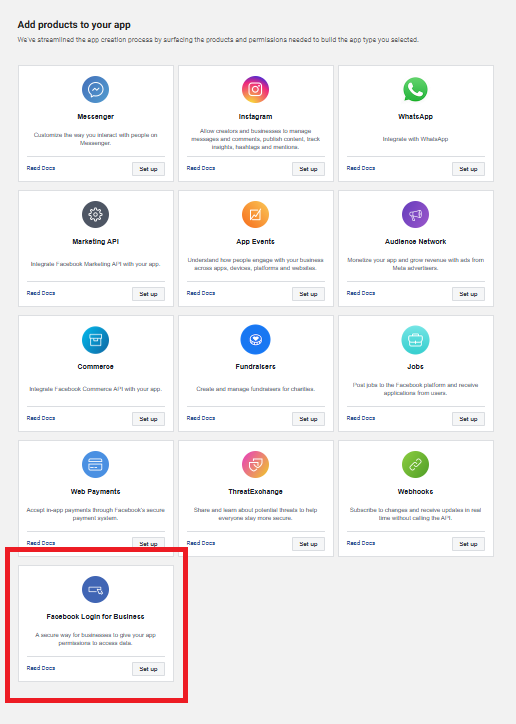
In the products section set up “Facebook Login for Business”.
-
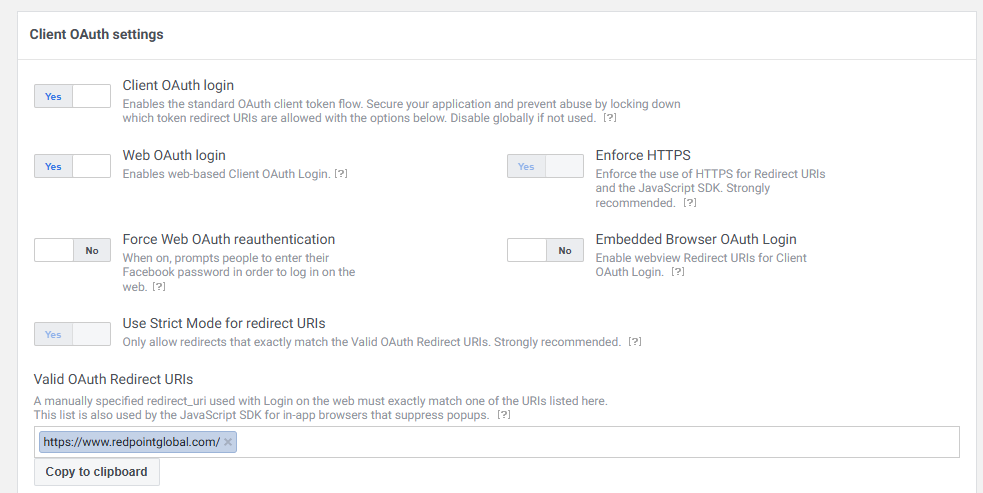
On the Facebook Login for Business settings page, fill in the Valid OAuth Redirect URIs with one or more URIs. These URIs will be used in authorizing a Facebook Audience channel in RPI.
-
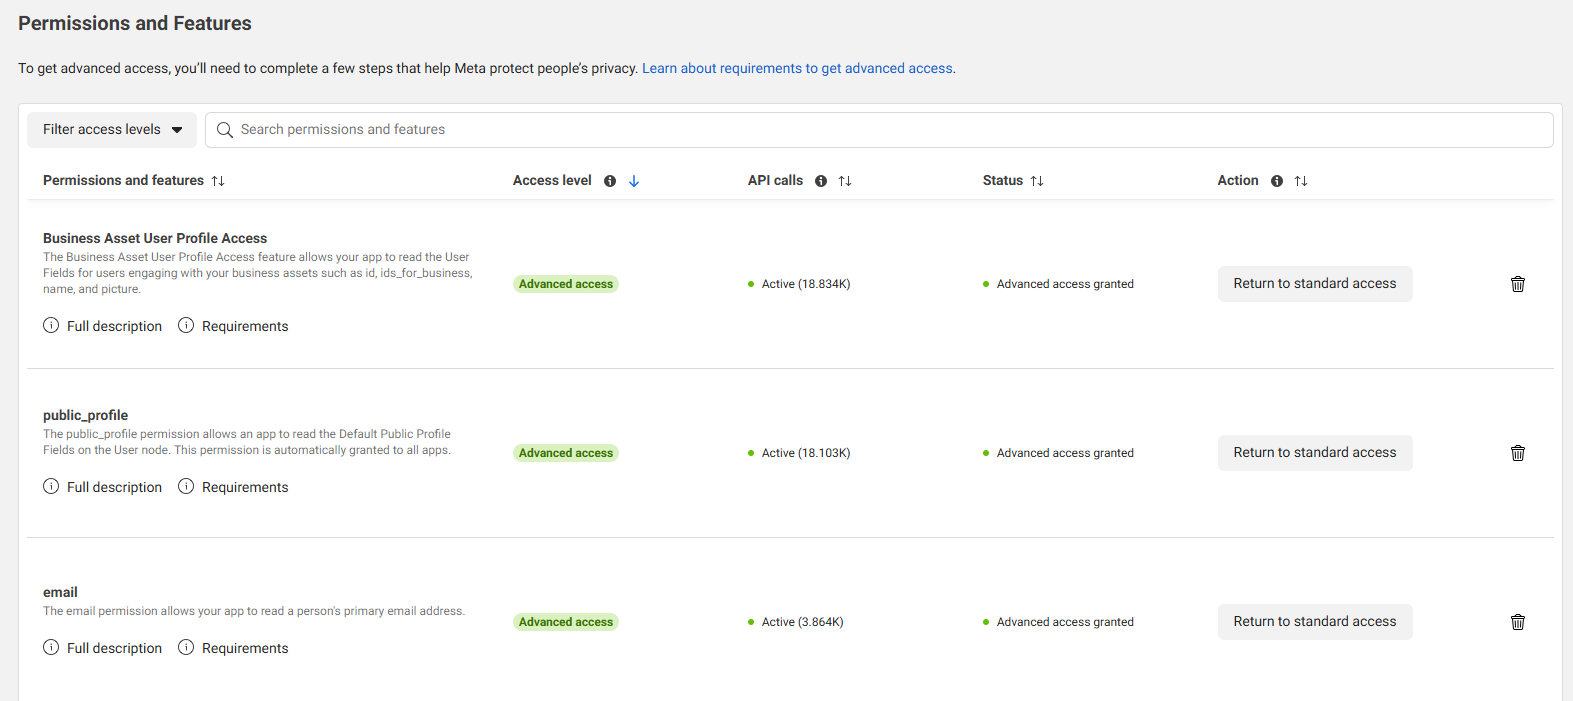
Change your Facebook Login for Business’ standard access to advanced access. Click Get Advanced Access.

-
On the Permissions and Features page, make sure that the following have advanced access level: Business Asset User Profile Access, public_profile, and email. For each permission/feature, click the Request advanced access button on the right. This step may require additional coordination with a Facebook representative to complete.
-
After setting up Facebook Login for Business, add the Marketing API product to your app. To do this, from the menu on the left click Products > Add Product. Then set up the Marketing API from the product selection. The default Ads API access level for a new app is Development.
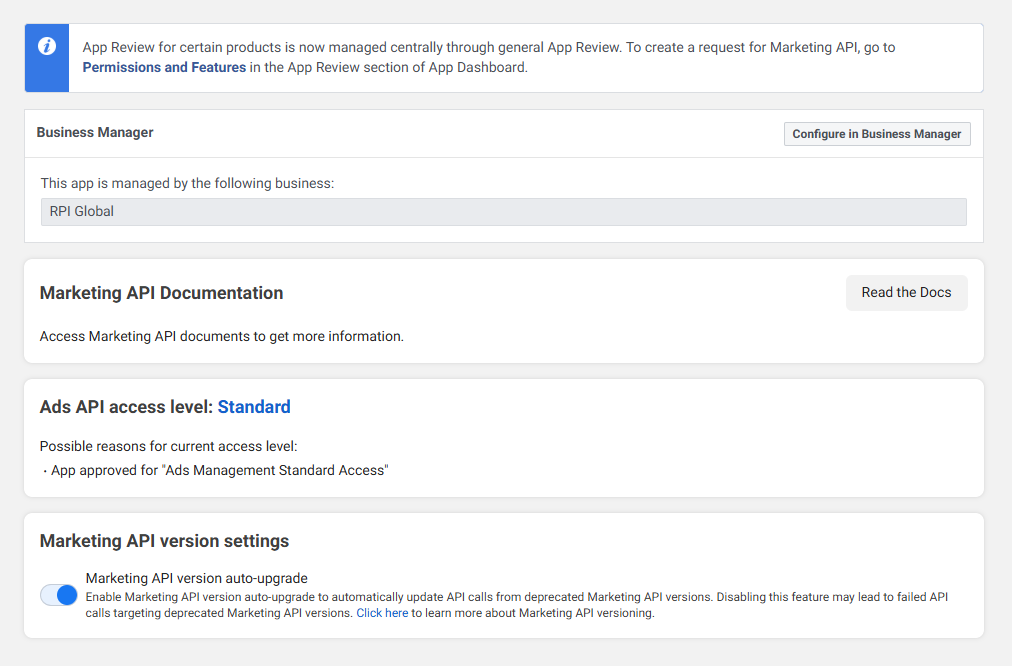
-
From the menu on the left, go to App Review > Permissions and Features. Look for Ads Management Standard Access. Click the Request advanced access button on the right to change the access level. This step may require coordination with a Facebook representative to complete.

Configure your Facebook app
This section provides information on configuring Facebook app settings.
Configure Facebook app basic settings
-
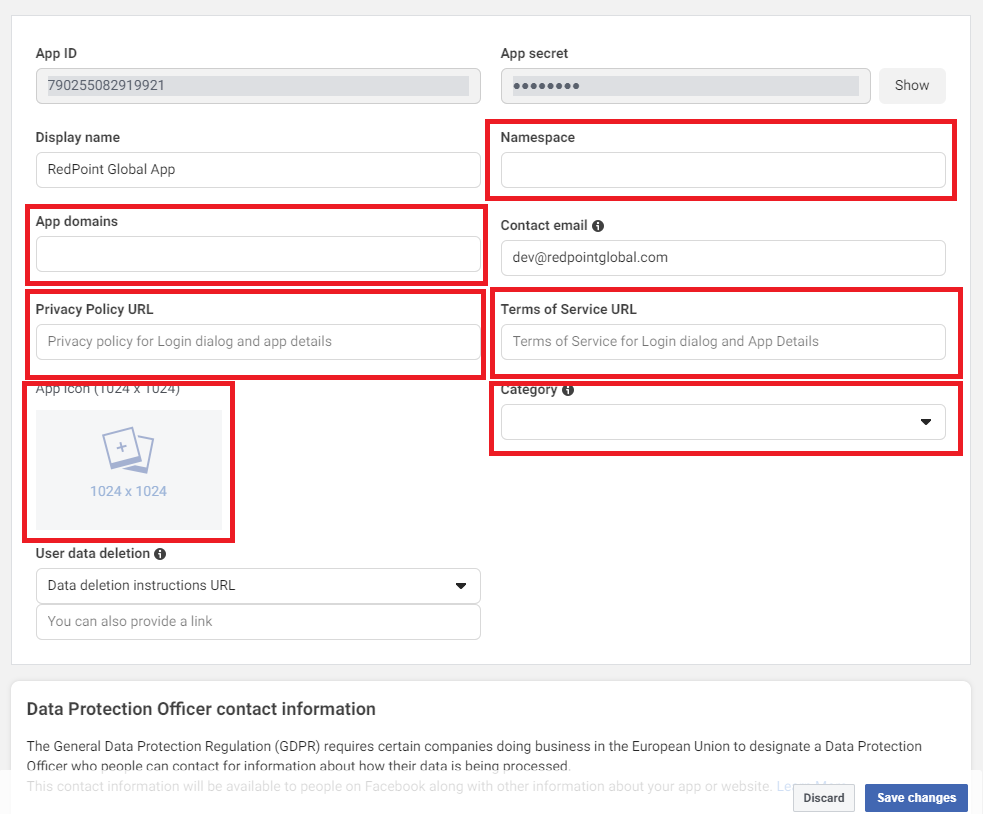
Open the Facebook App Basic Settings page by navigating to App Settings > Basic.
-
Fill in the following fields:
-
Namespace: the namespace can only contain lowercase letters, dashes, and underscores.
-
App Domain: must contain your company or organization’s website URL.
-
Privacy Policy URL: enter your company/organization’s Privacy Policy URL.
-
Terms of Service URL: (optional) enter your company/organization’s Terms of Service URL.
-
App Icon: the image must have a transparent background and cannot be larger than 1024 x 1024.
-
Category: choose any that apply to your organization.
-
-
Complete the Business Verification to connect your Facebook App to your Facebook Business Manager account.
-
This step is not required to start using the Facebook App with RPI’s connectors.
-
-
Scroll to the bottom of the page and select Add Platform.
-
Choose Website.
-
In the Site URL text box, enter the same URL used in step 2.
-
Complete the Basic configuration by selecting Save Changes.
Configure Facebook app advanced settings
-
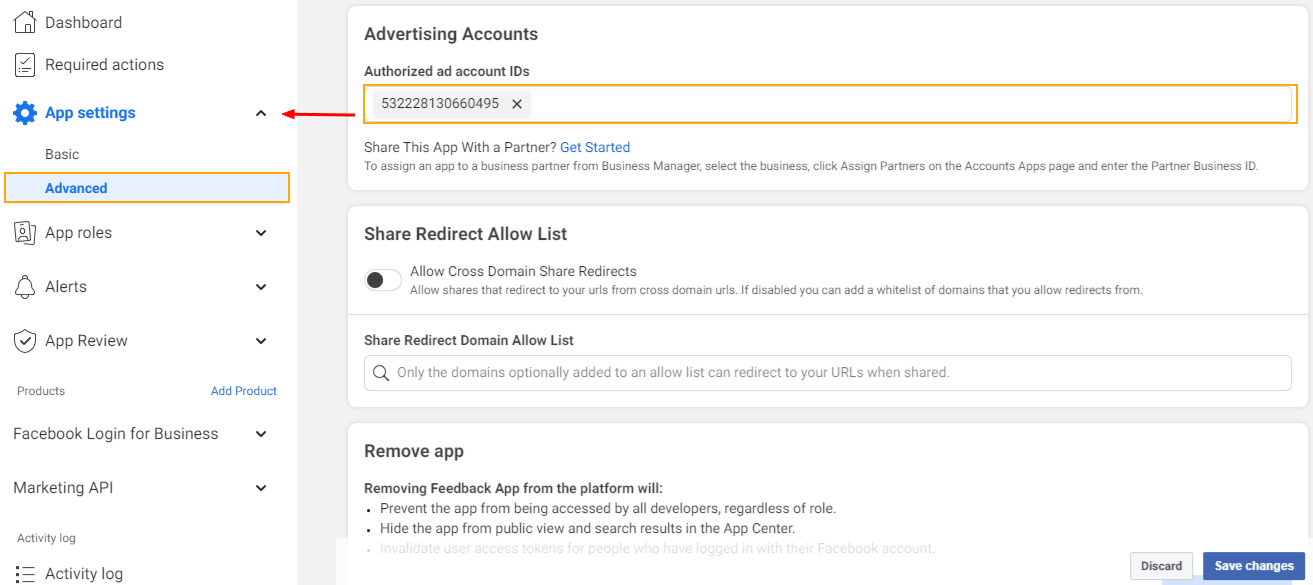
Open the Facebook App Advanced Settings page by navigating to App Settings > Advanced.
-
Toggle Yes for Native or Desktop app.
-
Choose the latest API version for both “Update All Calls” and “Upgrade Call for App Roles”.
-
Under “Advertising Account”, enter an Authorized Ad Account ID.
-
Once complete, click Save Changes to proceed to the next step.
Configure roles for the Facebook app
-
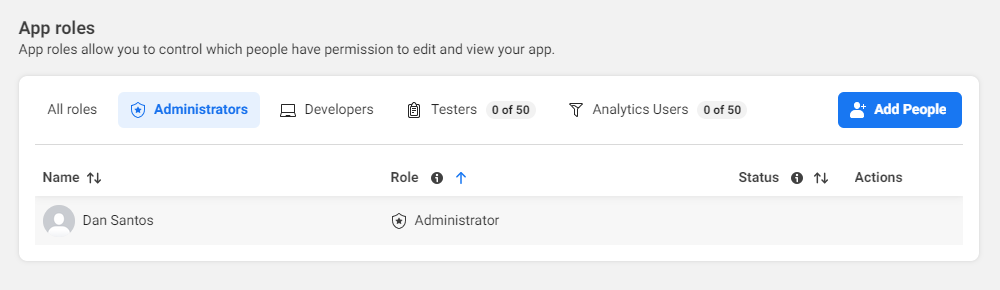
Open the Facebook Roles page by navigating to App Roles > Roles.
-
Under Administrators, associate the Facebook Account(s) that will be configured as the Authorized Account in the RPI Channel configuration.
Note regarding App mode
There is currently no requirement to approve the Facebook App before it can be used in RPI. The App can remain in Development mode and continue to be used. The only requirement is ensuring that the authorizing Facebook user account is configured as an Administrator in the App Roles. However, to use Facebook Marketing, the following permissions must be approved:
-
pages_manage_ads -
pages_manage_metadata -
pages_read_engagement -
pages_read_user_content -
ads_read -
pages_manage_posts -
pages_manage_engagement
Configuring RPI Channel: Important
App permissions can be retained with their default values unless other permissions are required.
Account name is the name of Facebook profile, not the page or app.
For applicable Facebook Channels, the Page Name is the selected page to use from one of the lists of associated pages to the Facebook account. This field is auto populated after successful authorization.
Creating an ad account and linking it to the Facebook app ID
-
Go to Business Manager Settings.
-
Select Settings.
-
Under Accounts, choose Ad Accounts.
-
Select Add Ad accounts.
-
Choose Create a new ad account.
-
Complete the required information and select Create Ad Account.
Link Ad account to your Facebook App
After creating an Ad account, link it to your Facebook App.
-
Go to App settings > Advanced.
-
Locate the Advertising Accounts section, and add the Ad Account ID(s) you want to use to promote your app.
Set up a payment method
Before you can start advertising, you will need to give Facebook additional account information and enter your credit card details.
-
Go to Business Manager Settings.
-
Navigate the Business Manager menu to locate Billing & payments.
-
Under Accounts > Ad accounts, select Add payment method.
-
Complete the required information then choose Next.
Create a pixel in business manager (optional)
The Facebook pixel is a piece of code that is placed on a website to report conversions, build audiences and get insights about how people are using the site. You can create up to 10 pixels in your Business Manager account.
-
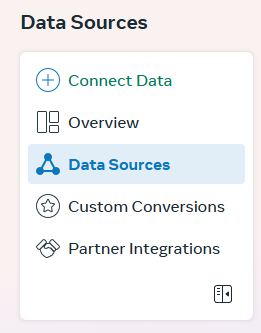
Go to Business Settings.
-
Under Users and Accounts, choose Data Sources.
-
Select Pixels.
-
Choose the blue Add button.
-
Provide a Pixel Name.
-
Agree to the Facebook Pixel Terms.
-
Select Continue.
-
To Start installing your pixel on your website, select Set Up Now. If you would prefer to stay in Business Manager, choose Continue.
Domain verification (optional)
Domain verification is ownership that controls editing privileges of URLs and other content to prevent misuse of your domain and to prevent the spread of misinformation. You may get the error “Only owners of the URL have the ability to specify the picture, name, thumbnail or description params” when running a Facebook Post or Facebook Marketing interaction without verifying your domain. For Facebook Post with an image, the source URL of the image must come from the verified domain.
Learn more and verify your domain.
Configure a Facebook Audience channel in RPI
Details about configuring a Facebook Audience channel in RPI are provided in the Reference guide; this section provides information about how to get the required information from Facebook.
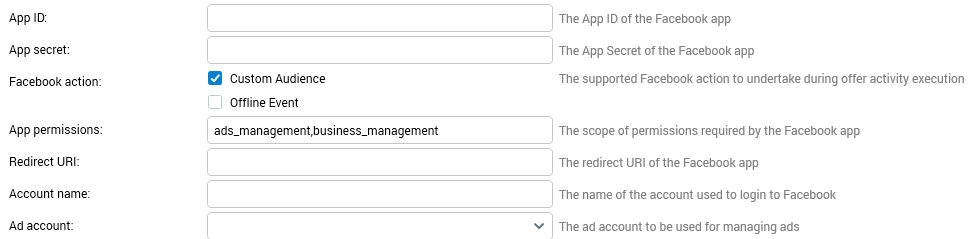
The following fields are required to set up a Facebook Audience channel.
-
To get the App ID and App secret, go to your app’s page. From the menu on the left, go to App settings > Basic.

-
To get the Redirect URI, from the menu on the left go to Facebook Login for Business > Settings. Use any of the URIs provided in the Valid OAuth Redirect URIs section.
-
For the Account name, use the name of the Facebook account used in reauthorizing the channel.
-
The Ad account field will only be populated after successful reauthorization of the Facebook login. Once filled, select the Ad account to be used for uploading custom audience or offline events. An ad account and an associated ad account ID number is already created for a Facebook account.
View Audiences
-
To view audiences, go to your Business profile on business.facebook.com.
-
From the menu on the left, click All Tools. Then click Audiences.
-
To access your ad account, go to Ads Manager. If you only have one ad account, it will be selected by default in Ads Manager.
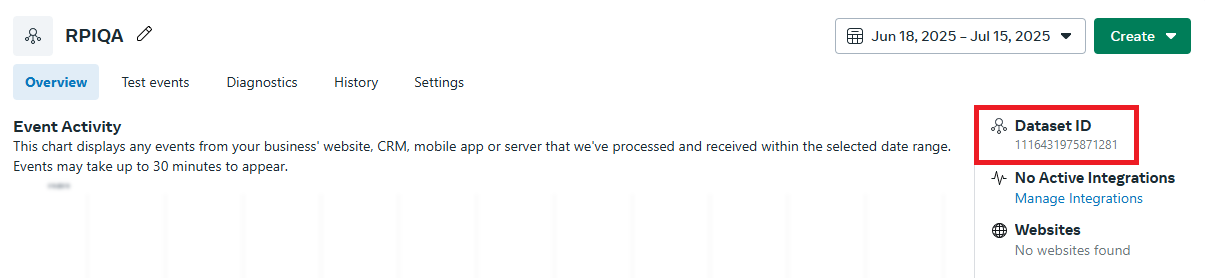
View Datasets (Offline Event Sets)
-
To view datasets, go to your Business profile on business.facebook.com.
-
From the menu on the left, click All Tools. Then click Events Manager.
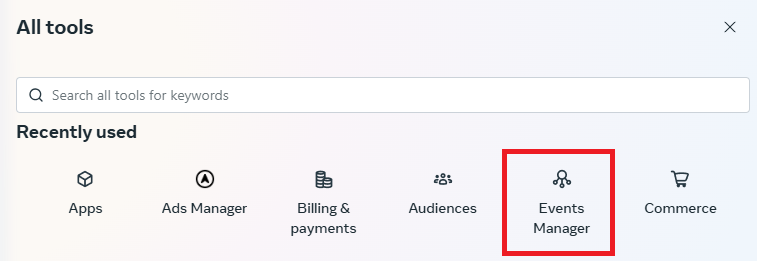
Click Data Sources to see a list of all datasets.
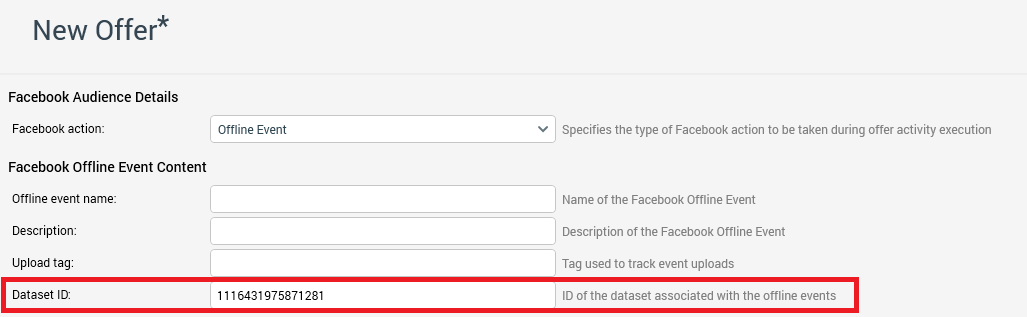
Click on a dataset from the list to see details. The Dataset ID is used in Facebook Audience offer designer’s offline event.